Employees must be added to a payroll before they can be paid. As a Cintra People administrator, you are responsible for ensuring employees' details are correct.
You can either add employees individually or using the import feature.
- Navigating to the payroll
- Adding a new employee
- Editing an existing employee
- Importing employees
- Deleting / archiving an employee
- FAQs
Navigating to the payroll
Once you've logged in to Cintra People:
- In the Payroll tab, select Payrolls in the side menu.
- If you have access to multiple payrolls, select the payroll you wish to view.
- The Payroll screen displays all the key information about the payroll and its current period.
Adding a new employee
Within the employee list of the Payroll screen, click Add employee. The first step lets you add the user's personal details.
You can add an employee to multiple payrolls only if the payrolls have separate PAYE numbers.
You may find some fields missing from the import spreadsheet or the new employee set-up process. To access these missing fields, use Cintra iQ or speak to your Bureau administrator.
Editing an existing employee
Within the employee list of the Payroll screen, click the ellipsis icon: ⋮ - beside the employee's name, then click Edit.
- When editing employees, some details (such as Employment ID or Start Date) cannot be changed.
- Some details, such as leaving date, pension contributions, or salary & allowances, are NOT available when creating an employee - only when editing them.
- Select the tab containing the information you want to change, then click the Edit button.
Use the links below for more information on editing employee information:

For more information on these tabs, open the relevant document in the Employee Management folder.
Importing employees
If you have a lot of employees to add, you may find it quicker to import them.
Within the employee list:
- Click Bulk import employees.
- Click Download Template.
- An employee.xlsx file will download to your computer.
- Open the file with Microsoft Excel or other spreadsheet application.
- For each employee, add their details into a new row of the spreadsheet.
- When you're finished, save the file (do not change the format from .xlsx), then either:
- Drag and drop the file into the highlighted area of the Bulk import screen or
- Click Browse this device, locate and add the file, then click Open.
- If there are any errors in the import file (e.g. missing mandatory fields), these will be displayed at the bottom of the screen. You will need to correct these and upload again before continuing.
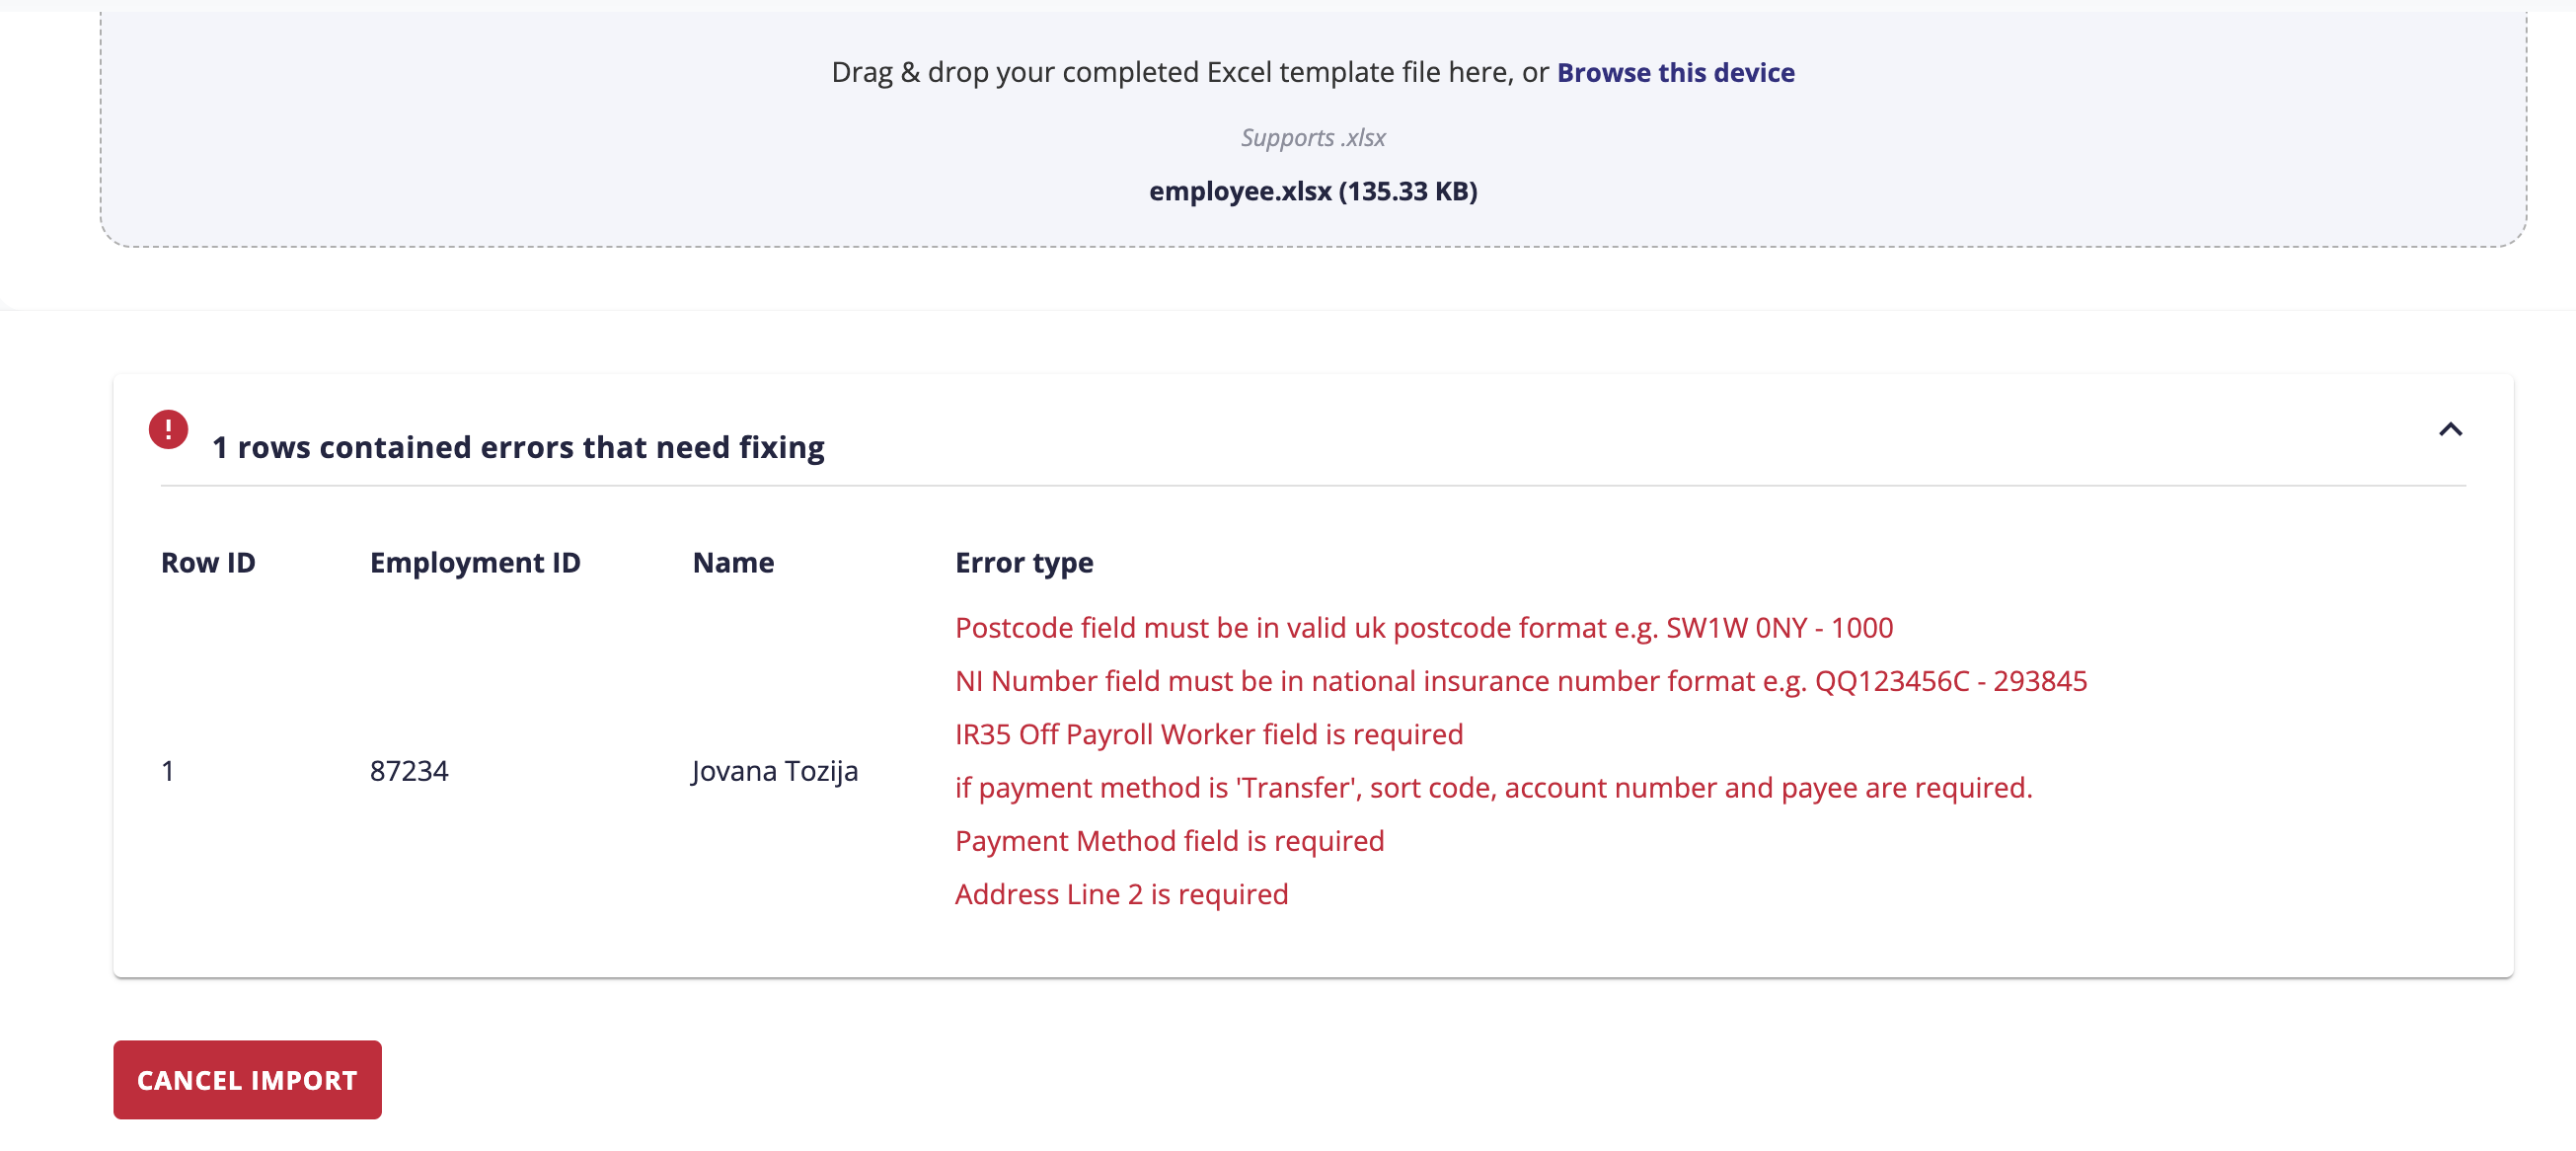
Click to view example of validation errors
- Once you've fixed any errors, click Complete Import to import all users into Cintra People.
Tips for filling in the spreadsheet
- The fields in the spreadsheet will vary, depending on how your system is set up.
- Generally, white columns are mandatory, whereas grey columns are optional.
- Some fields will let you enter text, others will force you to choose a value from a drop-down.
- Some fields will have a tooltip to inform you about limitations within the field (e.g. maximum 10 characters).
- You may find some fields missing from the import spreadsheet or the new employee set-up process. To access these missing fields, use Cintra iQ or speak to your Bureau administrator.
For more information on the fields found in the template, see Cintra People: New starter import template.
Deleting / archiving an employee
Deleting or archiving an employee can only be done in Cintra iQ by your bureau admin.
If the employee is no longer part of the payroll, you can mark them as a leaver. See Employee: Employment details / Employment & position.
FAQs
How do I mark an employee as a leaver?
If an employee has left, or is about to leave the payroll, you should edit the Employment & position tab of their record.
Why can't I record salary when adding an employee?
Salary can only be recorded once all their information has been added during the set-up process.
Why can't I add a new employee?
If the payroll is currently being processed, you can edit existing employees but not add new ones. Wait until the next payroll period is ready.
Previous article | Next article Employee: Personal and address details |
Was this article helpful?
That’s Great!
Thank you for your feedback
Sorry! We couldn't be helpful
Thank you for your feedback
Feedback sent
We appreciate your effort and will try to fix the article