Note: Before you generate your extract you need to create absence analysis report: How do I generate an absence analysis extract?
To run the report:
- Go to: Tools > Absence Reporting > Absence Analysis. The Absence Analysis Definitions window appears.
 (click to expand)
- Select the analysis definition you want, then click Report. The Absence Analysis Edit and Chart window appears.
(click to expand)
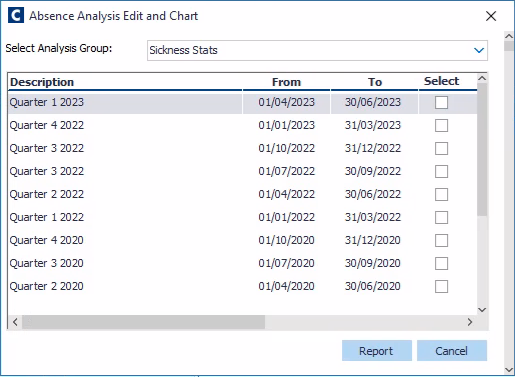
- Select one or more relevant Time Periods.
- Click the Report button. The Absence Analysis - Report Headings dialog appears.
(click to expand)
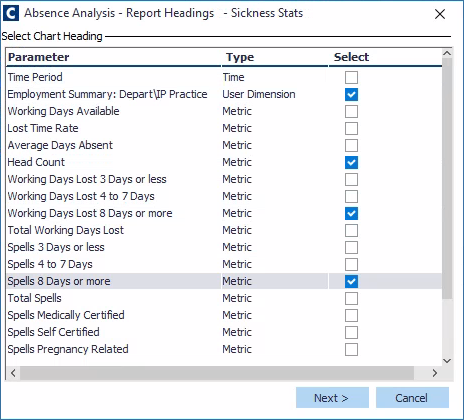
- Select one or more headings to appear in the report.
- You can only select time, user dimension, or more or metric types. You cannot mix them.
- Click the Next button to view a summary is display of your selections.
- Click Next. The Absence Analysis - Report Columns dialog appears.
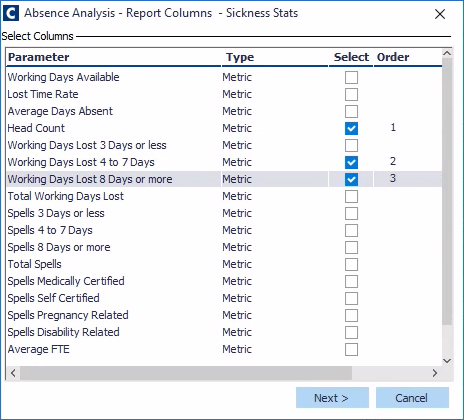
- Select which column(s) you want to appear in the report. The order in which you pick them will be the order they appear in the report (as indicated by the numbers in the Order column).
- Click Next to run your report. A message appears stating: "The document has been created in the following location - [location path]."
- Click the OK button. The report is generated and you can print or save as a PDF, .csv etc, in another location.
Note: If your report shows no data, this usually means that there is no Extract stored. Try creating an Extract for your Analysis Definition, then run the report again.
Was this article helpful?
That’s Great!
Thank you for your feedback
Sorry! We couldn't be helpful
Thank you for your feedback
Feedback sent
We appreciate your effort and will try to fix the article